
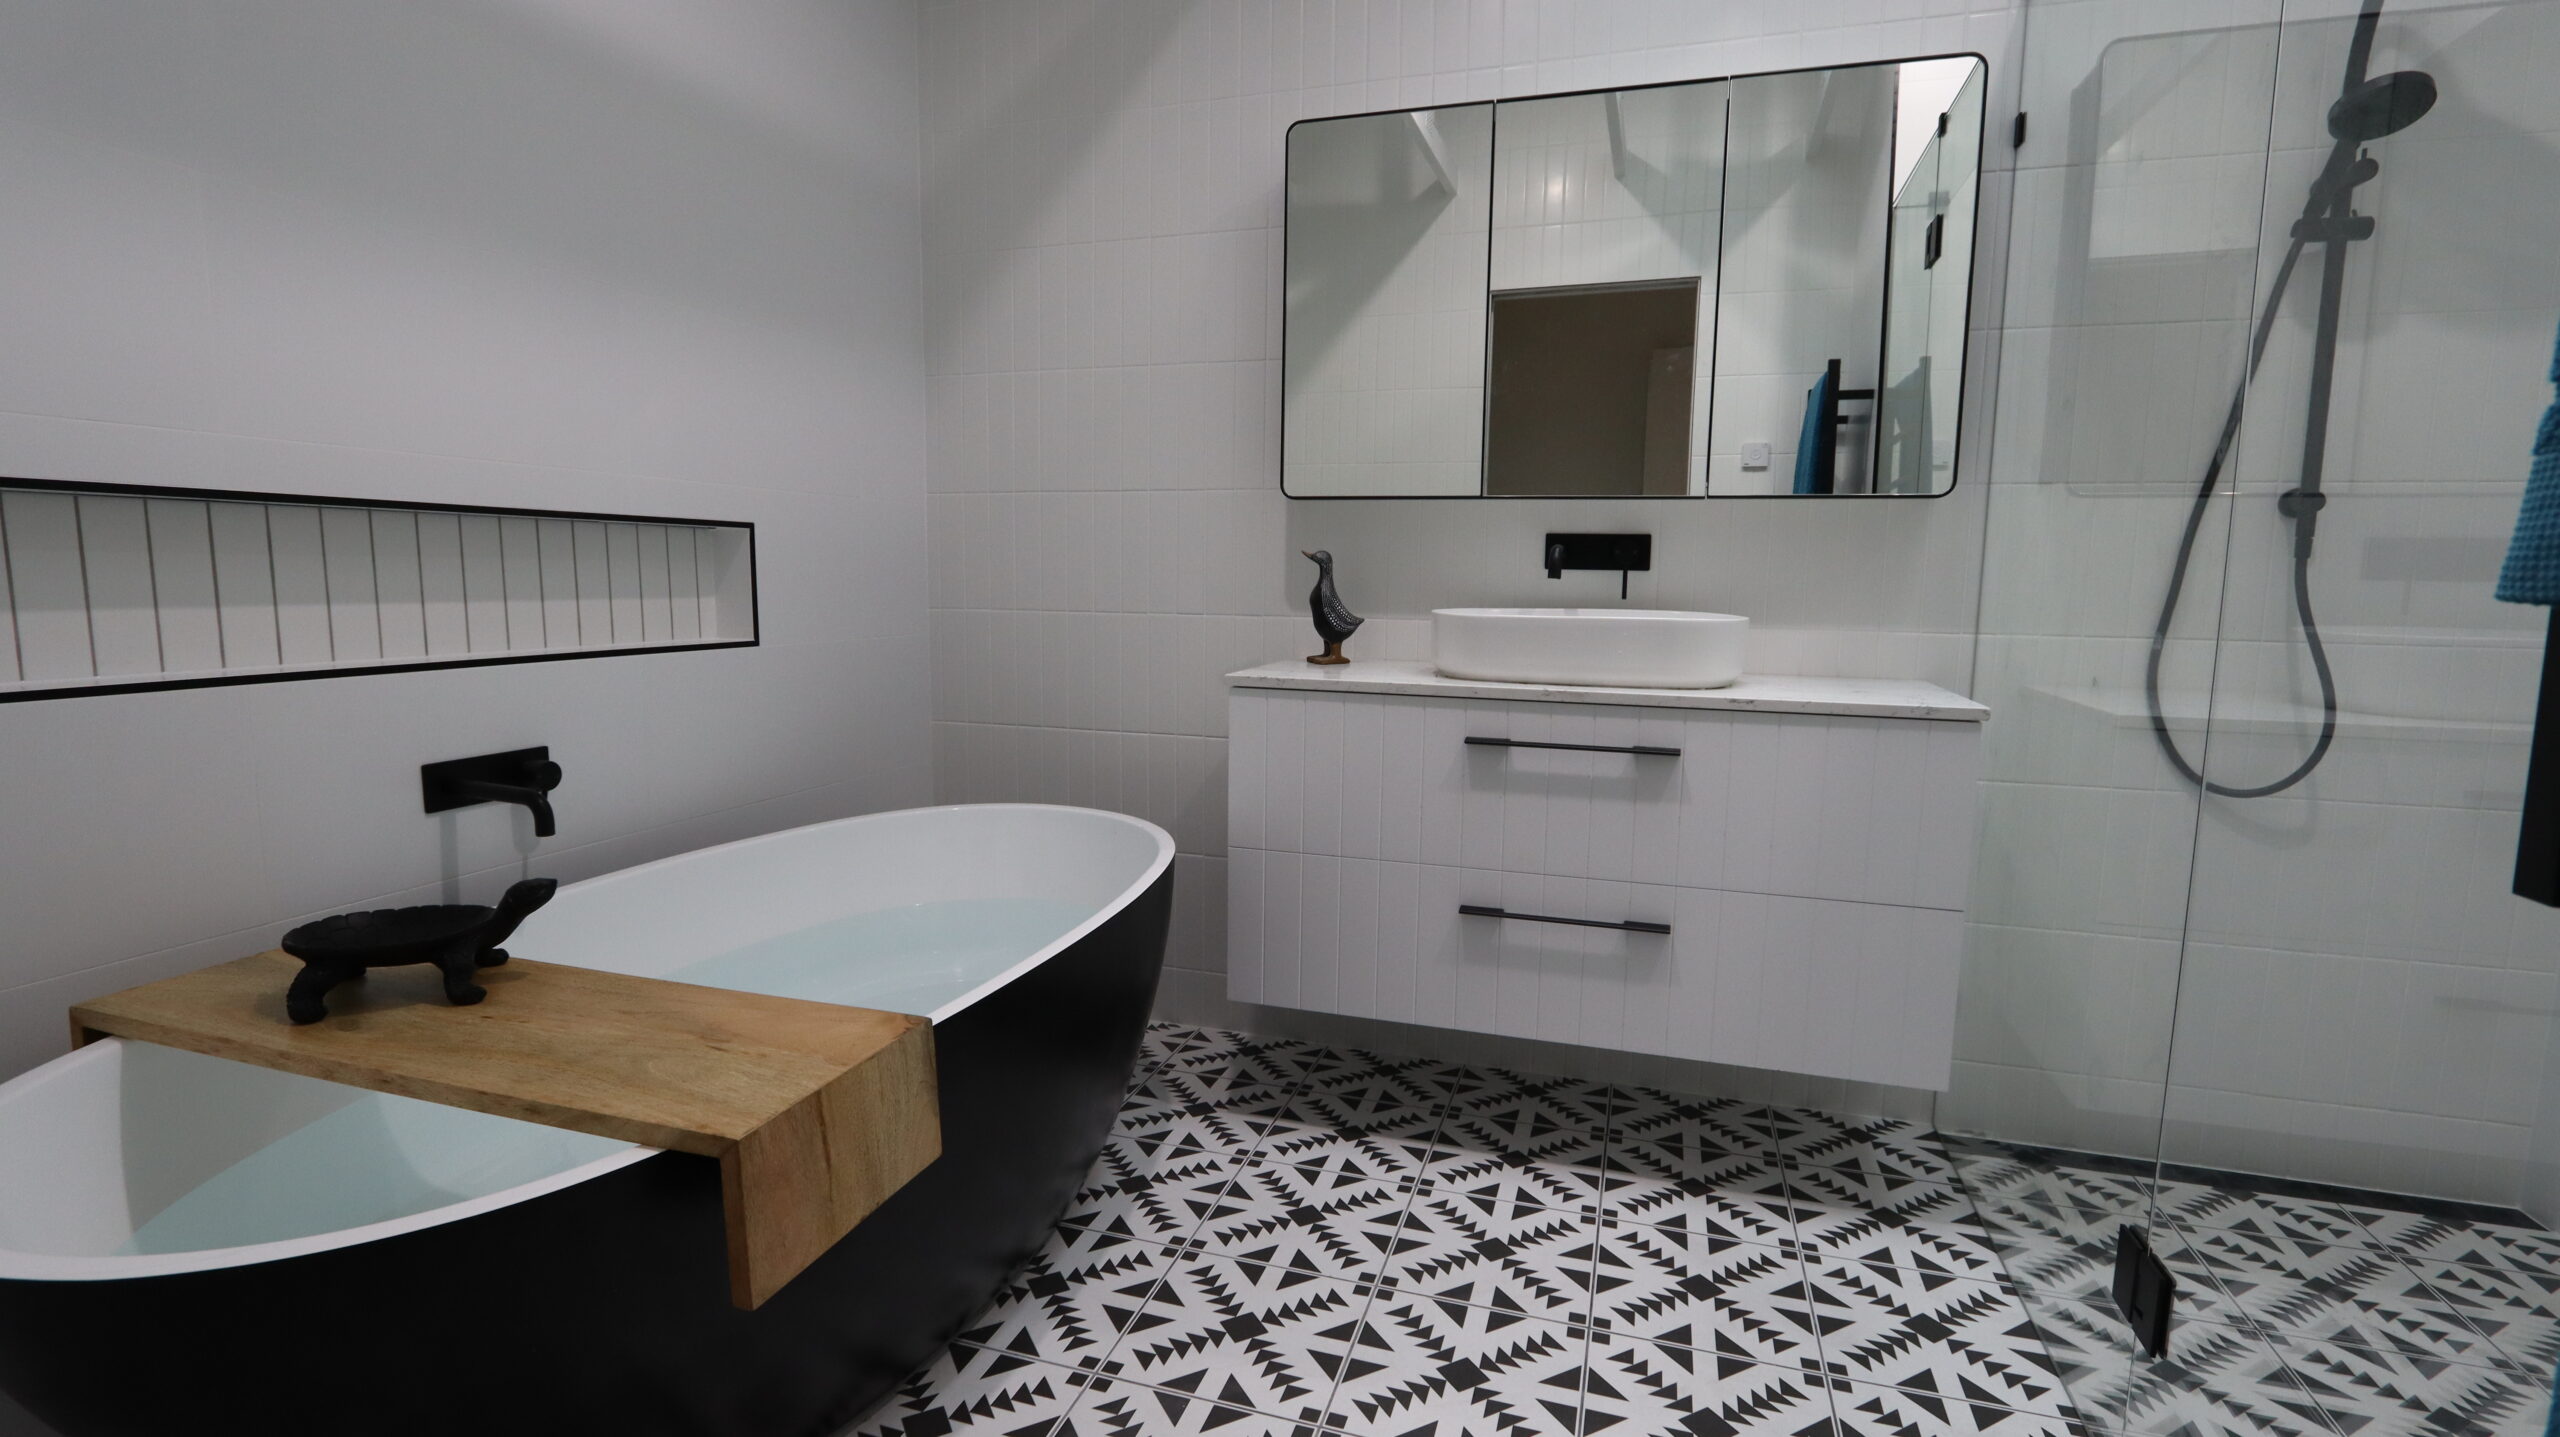
Small bathroom, big expectations
If you live in or invest in property around Cheltenham or Gloucester, there is a good chance at least one of your bathrooms feels tight on space. Maybe it is a compact family bathroom, a narrow ensuite, or a cloakroom that has quietly turned into a dumping ground. You still want it to look sharp, feel comfortable, and work hard every single day. That is where proper small bathroom design comes in.
What actually counts as a “small” bathroom?
Let us clear this up first. A small bathroom is not just “anything that feels a bit cramped”. In practice, a bathroom is small when:
- You have to think carefully about where every fixture goes to avoid that squeezed-in feeling.
- You cannot fit a full size bath, separate shower, large basin, and generous storage without compromise.
- Opening doors, drawers, or a shower screen clashes with something else.
- You feel like you are always one item away from clutter.
So this can mean a compact family bathroom, an ensuite tucked off the bedroom, or a downstairs WC that needs to do more than just hold a toilet and a tiny basin.
The size is less important than the experience. If the room feels cramped, awkward to move around in, or hard to keep tidy, you are dealing with a small bathroom in design terms.
Why clever design matters more in a small bathroom
In a large bathroom, you can get away with guesswork. In a small bathroom, every poor decision is in your face, every day. A badly placed towel rail or an overdeep vanity can make the whole room feel wrong.
Good small bathroom design is about three things:
- Function, so the room is easy to use without bumping elbows or knees.
- Durability, so you are not ripping it out again after a short time because fittings have failed or look tired.
- Calm, cohesive style, so the space feels intentional rather than squeezed together from random choices.
When those three come together, a small bathroom stops feeling like a compromise and starts feeling like a smart use of space that genuinely adds value to the property.
The usual problems with small bathrooms
Most small bathrooms share the same headaches. If you recognise any of these, you are in the right place.
Poor layout and awkward movement
You should not have to shuffle sideways to reach the toilet or dodge a door every time you get in the shower. Common layout issues include:
- Toilet too close to a wall or basin.
- Basins that stick out too far into the room.
- Baths or showers that feel hemmed in and claustrophobic.
- Doors that crash into radiators or units.
These problems all come back to lack of planning at the start.
Not enough storage
In a small bathroom, clutter builds up fast. Without planned storage, you end up perching bottles on the edge of the bath and loading the window sill with toiletries. It looks messy and makes cleaning awkward.
Dark, cramped feel
Heavy tiles, poor lighting, or a badly placed mirror can make a small bathroom feel even smaller. If you feel like you are stepping into a cupboard rather than a calm room, the design is working against you.
Short term fixes that age quickly
Cheap suites, basic fixtures, and quick patch jobs can look fine at first. The problem shows up later. Grout discolours, taps pit and stain, shower doors fail, and you are back at square one, spending more than if you had done it properly the first time.
The opportunities hiding in a small bathroom
The good news is that small bathrooms respond incredibly well to thoughtful design. When you plan carefully, you can:
- Make everyday use simpler, with better flow and fixtures that suit how you actually move in the space.
- Use high quality materials over a smaller area, so you get a more premium finish without the same outlay you would have in a big bathroom.
- Create a calm, luxurious feel that surprises people when they step in.
- Increase appeal for tenants or buyers, with a bathroom that looks considered rather than basic.
A compact room is often where you can justify that nicer tile, better brassware, or more design led furniture, because the quantities are lower. You invest in quality, not quantity.
Why a quick fix usually costs you more
If you are planning to hold the property or live in it for a long time, quick fixes rarely pay off. Some typical shortcuts look like this:
- Swapping out the suite like for like without touching the layout, even though it has always felt wrong.
- Using low cost fixtures that wear quickly in a steamy, hard working bathroom environment.
- Skipping proper waterproofing because “it will be fine”.
- Ignoring ventilation, so condensation and damp become a constant battle.
These approaches usually mean you pay twice. Once for the quick fix, then again when you have to upgrade or repair earlier than planned. For homeowners and investors who care about long term value, it makes more sense to treat a small bathroom as a permanent upgrade, not a temporary patch.
A small bathroom can feel high end
If you get the basics right, a small bathroom can feel every bit as impressive as a larger one. Careful choices around layout, storage, lighting, finishes, and fixtures create that “this just works” feeling you notice straight away.
If you would rather hand the planning over to someone who deals with tight spaces every day, you can work with a specialist in small bathroom design and fitting who understands how to squeeze function and style into compact rooms.
What this guide will help you do
This guide is written for you if you are ready to invest properly in your small bathroom rather than patching it for the short term. Across the next sections, you will see how to:
- Understand the real constraints of your space and how to plan around them.
- Use design principles that make a small room feel open and calm.
- Choose fixtures, storage, lighting, and finishes that last and look good in the UK climate.
- Budget realistically so you get quality where it matters instead of spreading money too thin.
You do not need a huge footprint to get a bathroom you are proud of. You need a clear plan, the right priorities, and a focus on quality over quick wins. The rest of this guide will walk you through that, step by step.
Understanding your bathroom space
If you want a small bathroom that works properly, you cannot skip this bit. Before you look at tiles, taps, or Pinterest boards, you need to know exactly what space you are working with and what you cannot move without serious work.
Good design starts with a tape measure, not a tile sample.
This is the stage most people rush, then they wonder later why the room feels tight or why the door clips the shower screen. Spend time here and the rest of the project becomes much easier and far less stressful.
Step 1: Measure the room properly
You need more than a rough width and length scribbled on a scrap of paper. Aim for a simple, clear room plan that shows accurate measurements and where every fixed point sits.
Use this basic measuring checklist:
- Overall length and width of the room, wall to wall.
- Ceiling height, including any changes where it drops over stairs or pipework.
- Door position, including width, height, and which way it opens.
- Window position, including sill height, width, and how far it opens into the room.
- Existing fixtures, such as bath, shower, toilet, basin, radiators, and any units.
- Obstacles, for example boxed in pipes, sloping ceilings, nib walls, or awkward corners.
Draw the room roughly to scale on plain paper, then mark your measurements on each wall. It does not need to look like an architect’s plan, it just needs to be accurate.
Key tip Measure twice, write it down once. In a small bathroom, being a few centimetres out can be the difference between a perfect fit and a unit that does not go in.
Step 2: Identify fixed elements
Next, work out what is genuinely fixed and what can move if needed. This is where you start to see what layout options are realistic, especially in older properties around Cheltenham and Gloucester where pipework and walls can be quirky.
Typical fixed or hard to move elements include:
- Soil pipe and toilet position The large waste pipe behind or under the toilet is one of the biggest layout anchors. You can often adjust the toilet position slightly, but big moves usually mean more cost and disruption.
- External walls and windows You are usually working around existing window positions. The height of the window sill will affect whether you can run a bath under it, where a shower screen can sit, and how much wall space you have for storage or a radiator.
- Stud walls and structural walls Stud walls can often be altered, but load bearing walls are a different story. If you are not sure what is structural, this is a good moment to involve a professional bathroom contractor.
- Existing plumbing runs Hot and cold pipework, as well as shower feeds, can often move, but long runs or awkward routes can bump up the budget. Short, tidy runs usually mean better pressure and fewer problems later.
- Electrical points Extractor fans, shaver sockets, and lighting positions must meet UK bathroom regulations. You can move them, but it needs proper planning and a qualified electrician.
Mark all of these on your plan. Once you see them in one place, you get a clearer sense of what you can sensibly change and what is better left alone.
Step 3: Map out how you actually use the room
A good small bathroom feels effortless to use. That does not happen by accident. You need to think about movement through the space and the order you do things.
Ask yourself:
- Where do you enter the room and what is the first thing you reach for?
- Do you shower most days, or is a bath non negotiable?
- Do you prefer storage near the basin, near the shower, or both?
- Do children or guests use this bathroom regularly?
- Do you need space to sit or lay things out, for example for skincare or medication?
On your plan, sketch basic shapes to represent fixtures, then imagine the route you would walk to use them in order. If your path doubles back on itself or you hit obstacles, the layout needs work.
Good small bathroom layouts usually:
- Keep the toilet out of the immediate eyeline from the landing or hallway if possible.
- Place the basin somewhere you can reach comfortably as soon as you enter.
- Reserve the most generous length of wall for the bath or walk in shower.
- Leave clear space in front of the basin and toilet so you are not twisted against a wall.
Step 4: Respect clearance and comfort zones
In a compact room, you need to be strict about clearances. Just because a fixture technically fits on paper does not mean it will feel good in real life.
Use this simple comfort checklist:
- Can you stand in front of the basin without your shoulder hitting a wall or unit?
- Can the toilet seat open fully and comfortably?
- Can a shower door or screen open without hitting anything, or would a sliding or hinged screen be better?
- Can the main door open easily without clipping radiators or furniture, or do you need to think about a different door type?
If you have to twist, squeeze, or shuffle in your head, you will hate it in reality. Adjust your plan until these movement areas feel clear.
Step 5: Spot where storage can actually live
Storage in a small bathroom is not an afterthought, it is part of the layout. Once your fixtures roughly sit in place on the plan, look for genuine storage opportunities.
Think in three dimensions:
- Above the toilet, for slim wall units or recessed niches.
- Under the basin, using a vanity unit instead of a pedestal.
- Inside stud walls, where a recess could give you extra depth without stealing floor space.
- Height on the walls, for tall, narrow units that keep the floor clear.
Mark storage zones on your plan early. This stops you ending up with a lovely suite and nowhere to put anything.
Step 6: Decide where change is worth the spend
Once you know your real constraints, you can make informed decisions about where to invest. Some changes deliver a huge improvement in daily use, others just soak up budget for little gain.
A simple way to assess changes:
- List each possible change for example moving the toilet, swapping a bath for a walk in shower, altering a door position, or adjusting the window sill height.
- Score the impact on function with a simple scale, for instance [low, medium, high]. Focus on how it changes movement, comfort, and storage.
- Score the likely cost and disruption again using [low, medium, high]. Plumbing and structural changes usually sit higher, fixture swaps tend to be lower.
- Prioritise high impact, medium cost changes These are often where you get the best long term value.
This kind of structured thinking keeps the project grounded. You are investing where it matters most for day to day comfort and long term value, not just chasing a look.
When to bring in a specialist
If you are looking at your sketch and thinking, “I cannot see how to make this work,” that is a good moment to involve a bathroom designer or fitter who understands small spaces. A site survey from a specialist in bathroom design and installation can reveal layout options that are not obvious on a basic drawing, and can also flag any plumbing or structural issues early.
The goal at this stage is simple understand your space so clearly that every design decision that follows feels obvious. Once you have accurate measurements, fixed elements mapped, and a realistic idea of how you want to use the room, you are ready to move on to the design principles that will make that small bathroom feel open, calm, and genuinely enjoyable to use.
Design principles for small bathrooms
You have measured the room, you know your constraints. Now comes the part that most people skip straight to, the look and feel. If you want a small bathroom that feels calm rather than cramped, the design principles you use matter just as much as the layout.
This is where you use colour, light, mirrors, and materials to cheat the eye and make every centimetre work harder.
Use colour to create calm, not chaos
In a compact bathroom, colour choices either open the space up or box it in.
Keep the base palette simple
- Pick one main light tone for most walls and, if you are tiling full height, for the majority of tiles.
- Use a second, slightly deeper tone for interest, for example behind the basin or in a shower niche.
- Bring in darker or stronger colours in small, controlled areas such as vanity units, trims, or accessories.
Light, neutral tones do not have to mean boring. The key is subtle variation, not a clash of strong colours fighting for attention. Too many bold shades in a small room make the walls feel like they are closing in.
Limit contrast breaks
Every sharp colour change chops the room visually. You want the eye to flow around the space, not stop and start.
- Blend wall and floor colours so they sit in the same family, rather than a stark light and dark split.
- If you love patterned tiles, keep them on the floor or in a single feature area, not across every surface.
- Match grout colour closely to tile colour where possible, so the grid lines do not dominate.
Think of colour as a backdrop that supports the room, not the main event. In a small bathroom, calm wins every time.
Light is your biggest ally in a small space
Good lighting does two jobs. It makes the room usable, and it makes it feel bigger and more inviting.
Plan layers of light
- General lighting for overall brightness. Recessed ceiling spotlights or a low profile central fitting work well in small rooms.
- Task lighting around the mirror for shaving, makeup, or skincare. Integrated mirror lights or wall lights either side of the mirror give a flattering, practical light.
- Feature or mood lighting such as an LED strip under a floating vanity, in a shower niche, or around a mirror. This adds depth and makes the room feel more considered.
Use dimmable circuits where practical. You get bright light when you need it, and softer light for evening baths or late night trips.
Make the most of natural light
- Keep window treatments slim and simple so you are not blocking light. Think blinds that sit within the recess, not heavy curtains.
- Avoid deep, bulky window sills. A slimmer finish lets more light travel into the room.
- Use pale reveals around the window so they do not read as a dark tunnel.
If the room has no window at all, good artificial lighting matters even more. In that case, pay extra attention to bright, reflective finishes and mirror placement.
Mirrors that actually work for the space
Mirrors are the simplest way to increase the sense of space in a small bathroom, but only if you position and size them properly.
Size with confidence
- Choose the largest mirror that comfortably fits the wall above your basin or vanity.
- Consider a mirror cabinet to combine reflection with storage, as long as the projection into the room still feels comfortable.
- Avoid lots of small, separate mirrors. One generous mirror usually looks smarter and feels more spacious.
Think about what the mirror reflects
- Ideally, the mirror should bounce natural light from a window or reflect the longest sightline in the room.
- Avoid placing a mirror where it mainly reflects the toilet, that never feels considered.
- If you have a feature wall tile, aligning the mirror to pick that up can double the impact without extra clutter.
Backlit mirrors work well in small bathrooms because the glow softens the edges. The mirror feels lighter on the wall and the extra light helps to brighten the whole space.
Choose materials that feel light but last
In the UK, bathrooms deal with steam, condensation, and regular temperature shifts. In small rooms, moisture builds quickly, so your materials need to cope without looking tired.
Think about visual weight
- Large format tiles on walls and floors reduce grout lines, which makes the room feel calmer and more spacious.
- Matte or satin finishes often feel softer in compact rooms, while very glossy tiles can create glare if the lighting is not planned carefully.
- Glass, light porcelain, and quality acrylics generally feel lighter than heavy stone effects across every surface.
Respect the bathroom environment
- Pick tiles and flooring designed for wet areas, with appropriate slip resistance.
- Use moisture resistant boards and properly specified adhesives and grouts so you are not dealing with blown tiles or mould patches later.
- If you like natural textures, keep them in low splash areas or use lookalike porcelain that gives the character without the constant maintenance.
In a small space, you are buying less material, so it usually makes sense to go for higher quality finishes. The room will live with daily use much better.
Layout planning that earns you space
Good layout is not just about where things fit. It is about where they feel right.
Position fixtures to free the floor
- Where structure and plumbing allow, consider a wall hung toilet and vanity. Keeping more floor visible makes the room feel bigger and makes cleaning easier.
- Use a single, continuous run for the main pieces where possible, such as toilet, vanity, then shower or bath along one wall. This keeps the middle of the room clearer.
- If you are choosing between a small separate shower and a combined bath and shower, think about who uses the room most and how often. One well sized fixture usually beats two cramped ones.
Use glass to keep sightlines open
- Opt for clear, minimal framed glass for shower screens rather than heavy, frosted panels.
- If you can fit a walk in style shower with a simple screen and no full enclosure, it often feels lighter and easier to use.
- Keep heights consistent where possible, for example top of tiles, mirror, and shower screen at similar levels, to avoid a messy skyline.
Before you sign off any layout, visualise yourself stepping into the room, turning, reaching, and drying off. If anything feels tight in your mind, it will feel tight in reality.
Keep the style consistent for a timeless look
Small bathrooms do not forgive random, mixed styles. To get a sophisticated, long lasting look, you need a clear style line from top to bottom.
Choose a style direction once
- Decide whether you want the room to lean more contemporary, more classic, or somewhere in between, before you start shopping.
- Use that decision to guide shapes, for example clean, straight lines for modern, softer curves for more traditional.
- Stick with one family of brassware, so taps, shower, and accessories share the same profile and finish.
Control the number of finishes
- Limit yourself to a small set of core finishes, for instance one wall tile, one floor tile, one main metal finish, and one or two furniture finishes.
- Use repeating details, such as the same handle style on vanity and storage, so the room feels joined up.
- Avoid mixing multiple metallic finishes unless you have a very clear plan. In a small room, this often just looks messy.
Timeless in a bathroom usually means restrained, well balanced choices. You can still add personality through towels, plants, and smaller accessories, which are easy to refresh later.
Bringing it all together
When you combine a smart layout with clear colour decisions, good lighting, generous mirrors, and well chosen materials, a small bathroom stops feeling like a compromise. It turns into a room that feels bright, calm, and deliberately finished.
If you would rather have an experienced eye pull those decisions together for you, working with a design led installer who specialises in compact rooms can make the process far easier. A team like NML Bathrooms’ bathroom design service can take your measurements, preferences, and budget, then turn them into a clear, buildable plan that respects both space and style.
Choosing high quality fixtures and fittings
In a small bathroom, fixtures and fittings do more than fill the space. They control how easy the room is to use, how solid it feels, and how long it stays looking fresh. If you live in your property or hold it as an investment, this is where it pays to step away from the bargain bundles and choose well designed, well built pieces that are sized correctly for the room.
Cheap fixtures are the fastest way to make a small bathroom feel tired.
You are working with a compact footprint, so you are buying fewer pieces. That gives you room to invest in quality without blowing the budget, as long as you choose with purpose.
What “high quality” really means in a small bathroom
Quality is not just a designer logo or a fancy tap shape. In a hardworking UK bathroom, you are looking for fittings that:
- Handle daily use, for years, without wobbling, leaking, or discolouring.
- Suit a compact layout, so they feel proportionate and do not crowd the room.
- Cope with moisture and limescale, which are normal in homes around Cheltenham and Gloucester.
- Are easy to clean, especially in tight corners where awkward shapes trap grime.
- Look consistent, so taps, shower, and accessories feel like one considered set, not a mix of whatever was on offer.
Think about how the bathroom will feel in [insert time frame] rather than on the day it is installed. That mindset shift changes your choices quickly.
Sinks and vanity units that work hard in small spaces
The basin is one of the most used items in the room, so it has to pull its weight both in function and storage.
Key things to look for in a compact basin and vanity
- Shallow projection that still gives you a decent bowl. You want something that does not stick too far into the room, but is not so tiny that water splashes everywhere.
- Integrated or sits on a vanity with storage. A basin on a pedestal wastes precious space underneath. In a small bathroom, that area is prime storage territory.
- Smooth lines and solid construction. Avoid fussy shapes that create awkward edges. Well glazed ceramic or quality solid surface basins are easier to clean and less likely to stain.
- Decent tap deck with enough space for the tap and for water to drain into the bowl. If the tap sits too close to the edge, you will get constant drips and splashes on the worktop.
Good storage focused features include:
- Soft close drawers or doors, which feel solid and stop slamming in a small echoing space.
- Internal drawers or organisers, so the inside does not become a messy black hole.
- Wall hung options, which free up visible floor and make the room feel larger and easier to mop.
If you are not sure what size will feel comfortable in your room, a bathroom specialist who regularly works in compact layouts, such as a team offering design led ensuite installations, can quickly steer you toward the right projections and widths.
Toilets that save space without feeling cramped
Toilets in small bathrooms are often either crammed into corners or oversized for the room. Neither feels good. A quality toilet for a compact space should balance comfort, neatness, and easy cleaning.
Space smart toilet choices
- Short projection or “compact” pans that do not jut into the room as far as standard models.
- Wall hung toilets paired with a concealed cistern, which make the floor easier to clean and give the room a lighter look. The frame sits inside the wall, so you gain visible space.
- Close coupled options with neat footprints if wall construction does not allow for concealed frames.
Quality focused details to watch for
- Solid, well fitting seats with soft close hinges. Flimsy seats cheapen the whole room and rarely last.
- Good glazing in the bowl, which helps resist staining and makes cleaning quicker.
- Rimless designs that reduce hidden channels where grime collects.
Remember the comfort zones you planned earlier. A good toilet choice respects clearance in front and at the sides, so you do not feel jammed against a wall or unit.
Showers that feel generous in a compact footprint
In many small bathrooms around Cheltenham and Gloucester, a well planned shower gives more day to day value than trying to squeeze in a full length bath. Whether you are doing a shower only room or a bath with overhead shower, fixture quality makes a visible difference.
Smart shower tray and screen choices
- Low profile or level access trays, which reduce trip hazards and help the room feel more open.
- Rectangular trays that use wall length efficiently, rather than tight corner quadrants that can feel cramped.
- Clear, minimal framed glass that keeps sightlines open. Heavy frames and frosted glass close the room in.
- Sliding or folding doors where swing space is tight, as long as the opening is still comfortable to step through.
Investing in good shower hardware
- Thermostatic valves that hold water temperature steady, which is safer and more pleasant in daily use.
- Quality brassware with solid metal bodies rather than lightweight plastic dressed up as chrome.
- Dual outlet setups (for example fixed head and handset) when budget and space allow, which give flexibility for quick rinses, hair washing, or cleaning the enclosure.
- Neat recessed valves where the wall build up allows, to keep projections down and give a cleaner visual line.
If you are considering a full wet room in a compact space, pay close attention to drainage, fall, and waterproofing. These are not areas to improvise. A specialist wet room installer, such as a company offering wet room design and fitting, will help you avoid future leaks and damp problems.
Taps and brassware that look good and last
In a small bathroom, the taps, shower controls, and accessories are the jewellery of the room. They are also some of the most handled items, so you feel the quality every day.
What to look for in quality taps
- Solid brass bodies with a quality finish in chrome, brushed nickel, brass, or black. These handle UK water conditions better than cheap mixed metals.
- Smooth cartridges or valves that turn easily without stiffness or grinding.
- Proportions that match the basin. A short, stubby tap on a deep basin or a tall tap on a tiny hand rinse looks wrong and often splashes.
- Matching range for basin, bath, and shower so the style and handle design runs consistently through the room.
Choose one metal finish and repeat it across taps, shower, towel rails, flush plate, and accessories. In a compact room, this consistency is one of the quickest ways to get a sophisticated, calm look.
Materials that suit the UK bathroom environment
Bathrooms in the UK deal with regular humidity and, in many homes, cooler building fabric in winter. That combination is hard on poor materials. If you want your small bathroom to stay smart rather than swell, peel, or pit, take material choice seriously.
Good material decisions for fixtures and furniture
- Moisture resistant carcasses for vanity units and furniture, not standard chipboard. Look for products clearly designed for bathroom use.
- Properly sealed edges around basins and worktops, to stop water creeping in and blowing panels.
- Ceramic, porcelain, or solid surface basins that resist staining and hair dye better than low grade plastics.
- Quality metal finishes on taps and showers, with good plating thickness to resist limescale and cleaning products.
Think long term with these checks
- Ask what cleaning products are safe for the finish, and pick ones that match how you actually clean, not how you mean to clean.
- Check whether moving parts, such as flush plates and shower valves, have readily available spare parts if something wears out.
- Look at fixings. Hidden, solid fixings nearly always signal a better product than flimsy surface brackets.
Remember, Cheltenham and Gloucester water can be hard in places, so scale build up on low quality finishes will show quickly. Spending a little more on robust brassware and proper furniture carcasses saves a lot of frustration later.
Why quality matters even more in a small bathroom
In a compact space, you are physically closer to every surface, every handle, every hinge. You see and feel the quality up close. Poorly made items are harder to hide, and failures such as leaks or swollen panels are far more disruptive because there is nowhere to decant things while you repair.
Investing in robust, space aware fixtures means:
- The room feels solid and reassuring to use day after day.
- You are not calling trades back for avoidable problems.
- Tenants or guests see a bathroom that looks intentionally high standard, not thrown together.
- The bathroom stays an asset to the property instead of a constant niggle.
If you prefer to have a professional walk you through fixture options that suit both your space and your budget, a design led installer such as NML Bathrooms’ renovation service can specify suites, brassware, and storage that match UK conditions and small bathroom layouts, then install them properly so you get the benefit for the long term.
Smart storage solutions for small bathrooms
Storage is usually the difference between a small bathroom that feels calm and one that always looks like a discount chemist. In a compact space, you cannot rely on a spare cupboard down the hall to bail you out. You need storage built into the room itself, planned from the start, and matched to how you actually live.
Proper storage is not a “nice to have” in a small bathroom, it is part of the design structure.
Get it right and the room stays tidy with very little effort. Get it wrong and you will forever fight piles of bottles, kids’ toys, and “I will just put it here for now” clutter.
Start with a clear storage plan
Before you think about pretty units, work out what you need to store. A simple, honest list goes a long way.
Use this quick storage audit:
- Everyday items you reach for daily, such as toothbrushes, skincare, shaving kit.
- Shower and bath products, including bulkier bottles or refill packs.
- Towels and spare loo rolls.
- Cleaning products and sponges.
- Medication or first aid, if you keep it in the bathroom.
- Occasional use items, for example hair tools or guest toiletries.
Next, split that list into two simple groups.
- Visible but tidy things you want easy access to, near the basin or shower.
- Hidden and out of sight things you would rather keep behind doors or drawers.
This gives you a clear brief for the kind of storage you actually need, instead of just buying a random tall unit and hoping for the best.
Recessed shelves that do not eat into floor space
In a small bathroom, anything that sticks out too far becomes a shoulder magnet. Recessed storage lets you steal depth inside the wall instead of from the room.
Good places to consider recessed niches:
- In the shower area for bottles and razors, so they are not balanced on the tray or a corner basket.
- Above the bath for candles, bath products, or a small plant.
- Above the toilet where a shallow recess can replace a bulky shelf.
Key design tips for recessed storage:
- Keep the bottoms slightly sloped towards the shower or bath to avoid water sitting in puddles.
- Tile the inside of niches in the same tile as the wall, or a single accent, to keep the look calm.
- Size niches to fit your tallest bottles, so you do not end up with products lying on their sides.
Recessed storage takes more planning than surface shelves, because you have to respect studwork, services, and waterproofing. A design led installer, such as NML Bathroom Renovations, will usually check wall build up early so niches go in the right places without compromising structure or moisture protection.
Vanity units that do the heavy lifting
The space under the basin is prime real estate. In a small bathroom, a pedestal is wasted space. A well chosen vanity unit offers deep, practical storage without crowding the floor.
What to look for in a compact vanity:
- Shallow projection that respects your circulation space, while still giving a decent basin bowl.
- Drawers rather than just doors where possible. Drawers pull contents towards you so items do not get buried at the back.
- Cut outs that work around pipework, or a design with internal drawers arranged around the waste, so storage stays usable.
- Wall mounted designs if your walls and plumbing allow it. Seeing more floor and skirting instantly makes the room feel more spacious.
Turn the basin area into a full storage zone:
- Use drawer dividers to create zones for daily items, so you can reach for them without rummaging.
- Pair the vanity with a mirror cabinet above, which gives extra space for medicines and smaller items.
- Keep finishes consistent with the rest of the room, so the unit feels integrated, not stuck on.
If you are unsure what unit size your space can realistically handle, a site survey from a specialist bathroom fitter can help you balance storage volume with comfortable movement, instead of guessing based on online pictures.
Multi functional furniture that earns its footprint
Every piece of furniture in a small bathroom has to justify itself. If it takes up floor space, it should do at least two jobs.
Solid multi function options include:
- Mirror cabinets, which combine a large reflective surface with hidden shelves for everyday items.
- Vanity benches or seats with storage inside, useful in family bathrooms or accessible spaces.
- Tall, slim storage units with a mix of open shelves at the top and doors or drawers below.
Use this simple rule if it only offers display and no storage, think twice. Open shelves can work, but they need discipline and are better used for a few well chosen items rather than every bottle you own.
Using vertical space properly
Most small bathrooms have more height than they have floor. The trick is to use that space without making the room feel top heavy.
Smart ways to build up, not out:
- Over toilet units that frame the cistern and provide cupboards or shelves above, instead of a bare wall.
- Tall cupboards in corners that would otherwise sit empty. Choose units that are slim rather than deep, so they do not block sightlines.
- High level shelves for items you do not need every day, such as spare towels or bulk products.
When you install taller pieces, keep the doors simple and the colours close to the wall colour. Strong contrast on a tall unit can make it feel like a wardrobe in a corridor. Blending it in helps it disappear visually while still doing a lot of work.
Open storage that still looks intentional
You do not have to hide everything. A small amount of open storage can soften the room and make it feel more personal, as long as you control what lives there.
Use open storage for:
- Rolled or neatly folded towels.
- A small plant or diffuser.
- A couple of well designed jars or containers.
Anything that naturally looks tidy is fair game. Anything that arrives in bright plastic, odd shapes, or lots of different labels sits better behind a door. Use refill bottles or uniform containers if you like the look of products on show, but want to avoid visual noise.
Building storage into the shower and bath areas
Shower corners stacked with wire baskets are one of the first signs a bathroom was not planned with storage in mind. When you design from scratch, you can build storage into these wet areas so they always look tidy.
Three solid frameworks to consider:
- Single large niche sized around your tallest bottles, centred or balanced on the wall for a clean look.
- Stacked niches if you need more capacity, for example one at bottle height and one higher for razors or smaller items.
- Shallow built out wall that hides pipework, with a full width ledge on top for storage, rather than awkward pipe boxes.
In a combined bath and shower, a long ledge or niche that runs the full length of the wall lets you move products easily and keeps the edge of the bath clear.
Keeping clutter off every surface
Good storage is not only about capacity. It is about making it easier to put things away than to leave them out.
Design with “put away habits” in mind:
- Keep daily use items at arm height and arm depth. If you have to bend, reach, or move things to get to them, they will live on the worktop instead.
- Give every category its own spot, for instance one drawer for hair care, one shelf for dental, one area for cleaning. Use simple baskets or organisers inside cupboards.
- Make sure children can reach what they are allowed to use, or cannot reach what you want to keep out of sight, so you are not constantly rearranging.
When the storage matches your routines, the room stays tidy with very little conscious effort. That is the real mark of good planning.
Storage that works with your design, not against it
In a higher quality renovation, storage should feel like part of the architecture, not a collection of add ons. That means matching finishes, lines, and proportions carefully.
To keep storage aligned with the overall design:
- Run tall units, mirrors, and shower screens to a similar top height, so the room reads as one composition.
- Keep door and drawer fronts clean and simple, with handles or cut outs that match your brassware choice.
- Repeat materials where you can, for example using the same finish on the vanity, tall unit, and any boxing.
When everything feels built in and consistent, the bathroom looks more expensive and more thoughtful, which is exactly what you want as a homeowner or investor who cares about long term value.
If you would rather have someone map out storage around your exact layout and routines, working with a specialist in design led bathroom renovations, such as a full bathroom design and installation service, means niches, vanities, and tall units are all planned as part of one clear scheme, not as afterthoughts.
Lighting and ventilation considerations
Small bathrooms live or die on lighting and ventilation. You can have the best layout and fixtures in the world, but if the room feels gloomy or keeps steaming up and growing mould, it will never feel high quality.
Good light makes a compact bathroom feel bigger. Good ventilation stops it falling apart.
This is where a lot of quick fit bathrooms cut corners, then spend the next [insert time frame] fighting condensation, black spots on the ceiling, and peeling paint. If you are investing properly in a renovation, it is worth planning this part with the same care as your tiles and fixtures.
Make the most of natural light
If your bathroom has a window or a rooflight, treat it as your biggest asset. The aim is simple, let in as much light as possible without sacrificing privacy.
Keep the window area clean and clear
- Use slim blinds or shutters that sit tight to the frame, so you do not block daylight with bulky fabric.
- Avoid deep window sills cluttered with bottles. They cut the light and instantly look messy in a small room.
- Keep reveals painted in a light, reflective shade, rather than a dark colour that turns the window into a tunnel.
Control privacy without killing brightness
- Choose frosted or patterned glass that diffuses light but still lets plenty in.
- Position any storage near the window carefully. A tall unit that crowds the side of a small window will make the whole wall feel heavier.
- Think about sightlines from outside. Sometimes a simple blind that drops partway is enough to give privacy without covering the entire pane.
If your small bathroom has no natural light at all, do not panic. It just means the artificial lighting plan has to carry more weight, and reflective surfaces become more important.
Plan your artificial lighting in layers
One lonely ceiling light in the middle of the room is not enough, especially in a compact space. You want a simple, layered setup that covers three jobs, general light, task light, and softer mood light.
1. General lighting
This is your base level brightness that lets you see the whole room clearly.
- Recessed ceiling spots work well in small bathrooms because they keep the ceiling clean and do not visually lower it.
- A single, low profile ceiling fitting can also work in very small rooms, as long as the light spreads evenly.
- Use warm or warm neutral light tones, not harsh blue white, which can make a compact room feel clinical.
2. Task lighting around the mirror
This is what you use for shaving, skincare, makeup, and general face level tasks.
- Integrated LED mirrors or mirror cabinets give even light across your face and double up as storage.
- Wall lights either side of the mirror reduce shadows and feel more flattering than a single downlight above your head.
- Position lights roughly at eye level where possible, so you are not lit only from above, which exaggerates shadows.
3. Feature or mood lighting
This is the finishing touch that separates a basic fit out from a room that feels designed.
- LED strips under a wall hung vanity or along a recess add a gentle glow and make the room feel deeper.
- Lighting inside shower niches or under a bath ledge makes these areas feel more intentional and useful at night.
- Separate switching lets you use only the softer lights for evening baths or late night visits, without waking yourself up fully.
Ask your electrician or bathroom installer to group lights sensibly, for example one switch for general lighting and one for mirror or feature lighting. That way you are not forced to use all or nothing.
Use light fittings suited to UK bathroom regulations
Bathrooms have specific electrical safety zones. In simple terms, the closer you get to water, the higher the protection level your fittings need. A competent, qualified electrician will handle this, but it helps to understand the basics so you do not fall in love with fittings that are not suitable.
Keep these points in mind when choosing fittings:
- Use fittings rated for bathroom use in the appropriate zones, especially near baths and showers.
- Recessed spots in the shower area should have a suitable IP rating and be properly sealed against moisture.
- All bathroom electrics, including fans and mirror lights, should be installed by someone familiar with UK wiring and bathroom regulations.
If you work with a design led installer such as a full bathroom installation service, they will usually coordinate lighting choices with an electrician, so you get fittings that both look right and comply with regulations.
Use surfaces and mirrors to bounce light around
In a small room, you do not just rely on the light source. You use surfaces to carry that light further.
Mirrors are your best friend
- Choose the largest mirror the wall can comfortably take without overwhelming the space.
- Consider a mirrored cabinet above the basin, which gives both reflection and storage.
- Position mirrors so they reflect either a window or the longest clear view across the room, rather than just the toilet.
Pick finishes that help light travel
- Use lighter tile shades in areas that struggle for light, such as corners away from the window.
- Glossy or satin tiles near the basin or shower can bounce light, as long as you avoid harsh glare by planning lighting sensibly.
- Keep grout lines as minimal as practical. Too many lines visually break the space and can make it feel smaller.
Good lighting on well chosen surfaces is one of the quickest ways to make a compact bathroom feel brighter, taller, and more open.
Ventilation, the quiet workhorse of a long lasting bathroom
If lighting is about how the room feels, ventilation is about how long it lasts. Small bathrooms in UK homes often sit on colder external walls or in the middle of the house without natural airflow. That combination of steam, condensation, and cooler surfaces is a perfect recipe for damp and mould if you do not manage it properly.
Ventilation is not optional. It is what protects your investment.
Choose an extractor fan that actually does its job
A basic, noisy fan that barely shifts air will not cope with daily showers in a compact room. You need a properly specified extractor that suits the size and layout of your bathroom.
Key things to look for in a good bathroom fan:
- Airflow output suitable for your room size, not just the cheapest unit on the shelf.
- Quiet operation, so you are not tempted to switch it off because it is irritating.
- Run on timers that keep the fan working for a set period after you switch off the light, so it can clear residual moisture.
- Humidity sensors where appropriate, which trigger the fan when moisture levels rise and switch it off when the air is dry again.
Placement matters as much as the fan itself. In many compact layouts, that means locating the fan near the shower or bath, and making sure the duct run to the outside is as direct and short as possible, with minimal bends.
Understand how moisture behaves in a small bathroom
When you run a hot shower in a compact space, warm moist air hits cooler surfaces and turns into condensation. You see it as mist on mirrors and water beads on tiles. Left to sit, that moisture gradually seeps into grout, paint, and plaster.
Your goal is to manage three things:
- How much moisture you create for example long very hot showers produce more steam than shorter, moderate ones.
- How quickly you remove moist air via good extraction and, where possible, natural ventilation.
- How well the room surfaces resist and release moisture through proper materials, tanking, and finishes.
You cannot totally avoid steam in a bathroom, but you can stop it lingering for hours and soaking into every surface.
Good everyday habits that support your ventilation
Even the best fan needs a bit of help from how the room is used. In small bathrooms, simple habits make a clear difference.
Build these into your routine:
- Run the extractor fan every time you shower or bathe, and let it continue for the full overrun period.
- Open the door slightly after a hot shower if the landing is not damp, to let fresh air in while the fan works.
- Keep clutter off window sills and ledges so air can move freely and surfaces can dry.
- Do not dry large loads of washing in the bathroom unless you have strong extraction, it adds a huge moisture load to a small space.
The aim is to help the air change quickly rather than trapping steam in a sealed box.
Design details that reduce damp risk
Ventilation works best when the rest of the bathroom is built to cope with moisture. In a quality renovation, that means planning finishes, heating, and details with damp in mind from day one.
Use moisture resistant materials in the right places:
- Moisture resistant boards behind tiles and in splash zones, not standard plasterboard where it can get soaked.
- Proper tanking in showers and wet areas before tiling, so any moisture that gets through the grout does not reach the structure.
- Paints designed for bathroom use on non tiled walls and ceilings, as they handle condensation better than basic emulsion.
Help surfaces dry out faster:
- Include a properly sized heated towel rail or underfloor heating if budget allows, both help dry the space and reduce cold, damp corners.
- Avoid big, cold dead zones behind bulky furniture where air never circulates, those spots often show mould first.
- Keep silicone joints neat and continuous around baths, basins, and showers, so water cannot creep behind fixtures.
A design and installation team that specialises in bathroom remodelling, such as a complete bathroom remodelling service, will usually build these details into the specification rather than treating them as extras.
Why good ventilation matters even more in a small bathroom
In a compact room, moisture has less volume of air to disperse into, so problems show up faster. Ceiling corners, grout lines, and window reveals are often the first to suffer. If you are investing in better tiles, quality furniture, and a careful layout, it makes no sense to let condensation slowly eat away at them.
When you combine strong lighting with well planned ventilation, you get:
- A bathroom that feels bright, inviting, and bigger than it is.
- Mirrors that clear quickly, so the room stays practical after every shower.
- Surfaces that stay cleaner for longer, with less mould, flaking paint, or stained grout.
- A space that holds its value, because the finish still looks solid years into regular use.
If you are serious about a higher quality renovation, treat lighting and ventilation as core parts of the design, not as things the electrician and fan supplier sort out at the end. That is how you get a small bathroom that not only looks good on day one, but still feels fresh, solid, and easy to live with well into the future.
Selecting flooring and wall finishes for a small bathroom
Flooring and wall finishes do far more than set the style. In a small UK bathroom, they control how big the room feels, how easy it is to keep clean, and how well it stands up to daily steam and splashes. If you are spending properly on a renovation rather than patching things up, this is an area where smart choices pay off for a long time.
You want materials that are durable, waterproof, and visually calm, not just whatever looks good on a sample board.
What your flooring needs to cope with
Bathroom floors in homes around Cheltenham and Gloucester deal with regular moisture, cold mornings, and plenty of foot traffic. A quick stick down “bathroom friendly” product is rarely the best long term option.
Good small bathroom flooring should tick these boxes:
- Water resistance so the floor does not swell, peel, or stain when it gets wet.
- Slip resistance that still feels comfortable under bare feet. You want secure footing, not a gritty sandpaper feel.
- Dimensional stability so it does not move, curl, or gap as temperatures and humidity shift through the year.
- Easy cleaning with normal household products. You should not need specialist cleaners for daily life.
- Visual simplicity that makes the room feel larger instead of breaking it into busy sections.
Once you are clear on performance, you can focus on the look without compromising the basics.
Tile flooring in small bathrooms
Properly installed ceramic or porcelain tiles are still one of the most robust flooring choices for UK bathrooms. In small rooms, the way you choose size, colour, and layout matters as much as the tile itself.
Tile size and layout
- Larger tiles on the floor reduce grout lines, which keeps the room feeling calmer and more open.
- Rectangular tiles laid lengthways along the longest dimension of the room help stretch that sightline and reduce the “short box” feel.
- A simple straight lay pattern is often better than complex patterns that chop the floor visually.
Grip and comfort
- Look for tiles rated for bathroom or wet area floors, with a slip rating suited to your needs.
- A light texture is often ideal. Completely smooth, glossy tiles can feel slippery when wet, while very rough textures are hard to keep clean.
- If you are planning underfloor heating, confirm the tile is suitable and that the installation method supports it.
If you want tile detail that looks sharp rather than DIY, it is worth working with a specialist bathroom tiler. A team like a dedicated bathroom tiling service will know how to set out cuts, align grout lines, and detail edges properly in a small space.
Other flooring options and how to judge them
You might be considering alternatives to tile, especially if you prefer a slightly warmer feel underfoot. The key is to separate marketing claims from what survives real bathroom conditions.
Use this simple framework to assess any bathroom flooring product:
- Moisture rating Check whether the product is described as “waterproof” or only “water resistant”, and whether that applies to standing water or just occasional splashes.
- Subfloor requirements Understand what preparation it needs on timber or concrete, including any extra boards, levelling, or adhesives.
- Temperature tolerance Confirm it suits underfloor heating if you plan to add it, including maximum temperature guidelines.
- Cleaning routine Make sure the recommended cleaning products match how you actually clean, not an ideal world where you only ever use a specific mild detergent.
- Repair and replacement Ask how easy it is to replace a damaged section without disturbing the entire floor.
If any of those points feel vague or overcomplicated, move on to a more robust flooring choice. A small bathroom does not leave much room for hidden weaknesses.
Wall finishes that work with a small footprint
Walls in a bathroom are constantly fighting steam and direct water contact. In a small space, where air does not travel as freely, poor finishes show wear much faster. You want a clear plan that balances tiling, paint, and any feature finishes without turning the room into a patchwork.
How much of the wall should you tile?
There is no one rule, but there are principles that work well in compact rooms.
Areas that usually deserve full tiling:
- Inside showers and around baths, including any recessed niches and at least to the height of the shower head.
- Behind basins where water splashes regularly, especially if you have children or a wall mounted tap.
- Any walls that can be hit with direct spray from hand showers or flexible hoses.
Areas where a mix of tile and paint can work:
- Walls away from direct water, where a moisture resistant paint can cope with condensation.
- Upper sections of walls above a half height tile, as long as the junction is finished cleanly with a neat top line.
- Ceilings, which are normally better painted with a product built for steamy rooms rather than tiled.
In small bathrooms, fully tiling all walls can look smart if the tile choice is calm and cohesive. Half tiling with the wrong proportions can cut the room in half visually, especially if you use a dark colour above or below a strong dividing line.
Choosing tile size and pattern for the walls
Wall tiles have a big impact on how closed in or open the room feels.
Use these guidelines for a small bathroom:
- Large format tiles on the walls reduce grout lines and help the eye travel without interruptions.
- Vertical stacking or vertical patterns, such as upright rectangles, can make the ceiling feel higher.
- Keep patterns restrained. A single feature wall or a detailed area inside the shower is usually enough.
- Match, or at least closely coordinate, grout colour with the tile to stop the grid dominating.
If you like the idea of smaller format tiles, such as metro or mosaic, use them in controlled areas, for instance a basin splashback or niche interior, rather than every wall. In a compact room, too many joints make the space feel busy.
Colour choices that stretch the space
Colour on floors and walls does more than set a mood, it directly affects how big the bathroom feels.
Solid colour strategies for small bathrooms:
- Keep the base light Use lighter tones for the majority of walls and, often, the floor. This reflects light and helps the room feel wider and taller.
- Stay in one colour family Choose shades that are related rather than jumping between warm and cool tones. That creates a smoother, more grown up look.
- Limit high contrast Strong dark floors against very light walls can look sharp in a large room, but in a small one they often chop the space visually.
Using darker or stronger colours carefully:
- Reserve bolder tones for elements like vanity units, a single feature wall, or niche interiors.
- Use them where there is good light, natural or artificial, so they do not feel oppressive.
- Repeat the same dark tone in a few places, for instance cabinet and towel rail, rather than scattering multiple different colours.
A simple rule helps here. If you are not sure, keep the hard surfaces calm and bring personality in through towels, accessories, and easily changed items.
Textures that feel high quality, not heavy
Texture brings warmth and interest, but in a small bathroom it can also make the room feel crowded if you use too much.
Smart ways to use texture:
- Choose one main textured element, such as a soft stone effect tile, and let everything else stay smoother.
- Use stronger textures in smaller areas, for example behind the basin, inside niches, or on one key wall.
- Balance textured tiles with flatter, simpler floors or vice versa, so you do not get a clash of competing surfaces.
Remember you will see these surfaces up close. Cheap faux textures often look fine from a distance but feel plastic when you stand in the room. Because a small bathroom uses less material, this is the perfect place to step up in quality.
Creating visual flow between floor and walls
One of the biggest mistakes in compact bathrooms is treating floor and walls as separate decisions. When you look into the room, your eye reads them together.
Use these principles to keep everything joined up:
- Decide first whether you want the floor or the walls to be the main visual focus. Not both.
- If the floor has pattern or stronger tone, keep the walls simpler and lighter.
- If the walls carry the interest, let the floor sit back in a quieter, supportive shade.
- Repeat a colour from the floor in details such as grout, vanity finish, or accessories to tie the scheme together.
In many high quality small bathrooms, the most successful look comes from a calm, almost seamless pairing of floor and wall tiles, with interest coming from shapes, brassware, and lighting instead of loud surfaces.
Details that make finishes last longer
Good products can still fail if the detailing is lazy. In a small bathroom every joint, trim, and edge is in easy reach, so poor work stands out.
Pay attention to these finishing details:
- Use proper waterproofing behind tiles in wet areas, not just tile adhesive on bare boards.
- Specify quality trims for tile edges in a finish that matches your brassware, not bare, sharp tile edges.
- Keep grout joints consistent and suitable for the tile size, neither too wide nor pin thin and fragile.
- Use high quality, mould resistant grout and silicone in wet areas to keep joints cleaner for longer.
Good tilers and bathroom fitters automatically handle these details, but it helps to know what to look for so you can judge the quality of what is being proposed. If you want one team to handle design, finishes, and installation together, a company like a bathroom fitting specialist can coordinate those choices and the workmanship behind them.
Why flooring and wall choices matter so much in a small bathroom
In a compact room, surfaces are the backdrop to everything. There is nowhere for your eye to escape, so any clashing tile, awkward colour shift, or tired finish is right there every time you step inside.
When you choose durable, waterproof, and visually calm finishes for floor and walls, you get:
- A bathroom that feels larger and lighter than its footprint.
- Surfaces that handle daily steam, splashes, and cleaning without fuss.
- A look that still feels current after [insert time frame], not tied to a short lived trend.
- A space that supports the value of the property rather than dragging it down.
If you are serious about getting your small bathroom right first time, treat flooring and wall finishes as core structural choices, not decoration. Plan them with the same care as layout and fixtures, and the room will repay you every single day you use it.
Budgeting for a quality bathroom renovation
A small bathroom still needs a grown up budget. If you are renovating a compact space in Cheltenham or Gloucester, the aim is not to spend the least you can get away with, it is to spend wisely so the room feels solid, works well, and does not need doing again in a short time.
You are not just buying a “new bathroom”. You are buying years of hassle free use.
That mindset shift changes how you plan your budget. Instead of chasing the cheapest quote or the flashiest tiles, you put your money where it has the most long term impact.
Start with a realistic total budget range
Before you choose a single tap, decide what you are prepared to invest in the room. This stops you drifting into either of the two common traps, blowing money on showpiece items with nothing left for installation quality, or going bargain basement and paying again when things fail.
Use this simple way to frame your budget:
- Set a comfortable range Decide your ideal spend and a sensible top limit. Treat that upper number as your maximum, not your target.
- Allow for full replacement, not just cosmetic work If you are serious about long term value, assume you will be updating plumbing, electrics, and waterproofing, not just swapping suites.
- Keep a contingency Reserve a small percentage of your budget as a buffer for hidden issues, especially in older properties. Things like rotten flooring under an old shower are common discoveries.
Once you have that range, every decision becomes a choice about how to slice that budget, rather than a vague hope that it will somehow all add up.
Understand what you are actually paying for
A proper bathroom renovation has several cost areas, even in a small room. Knowing what they are helps you avoid shaving money in the wrong places.
The main budget areas usually include:
- Design and planning Time spent measuring, drawing layouts, and choosing a coherent scheme. Skipping this bit often shows later.
- Labour Stripping out the old bathroom, first fix plumbing and electrics, boarding, tiling, fitting, and finishing. This is the backbone of a successful project.
- Core materials Plumbing components, boards, tanking, adhesives, grout, and basic building materials. You rarely see these, but they decide how long the room lasts.
- Fixtures and fittings Bath or shower, toilet, basin, brassware, furniture, and storage.
- Finishes Tiles, trims, flooring, paint, mirrors, and lighting.
Some quotes lump these together, others split them out. What matters is that, in your mind, you respect each area. A great tap on poor plumbing is still a poor job. Perfect tiles on bad boarding will still crack or leak.
Where to prioritise spending for long term value
Not every line item deserves the same slice of the budget. If you care about longevity and daily comfort, some areas have far more impact than others.
Put more of your budget into:
- Labour and installation A skilled installer who understands small bathrooms is worth more than any upgrade tile. Good preparation, straight walls, proper falls to drains, and neat details are what keep the room solid.
- Waterproofing and structure Proper tanking in showers, moisture resistant boards, and stable subfloors are what stop leaks and movement that ruin finishes.
- Plumbing quality Reliable valves, correct pipe sizes, and thoughtful routing give you consistent pressure and fewer callouts later.
- Key fixtures Toilet, shower hardware, and basin or vanity get used constantly. Cheap ones feel flimsy very quickly.
Areas where you can control costs more easily:
- Tile choice within the right category Once you have chosen an appropriate type of tile, you can often adjust within that range on price without losing performance.
- Furniture style and finish You can go for a mid range vanity with a durable finish instead of a premium brand, as long as the construction is solid and moisture resistant.
- Accessories Towel rails, robe hooks, and decorative items can be upgraded later if needed, as long as you plan the positions and fixings now.
If you have to choose between a high quality shower valve behind a mid range tile, or a designer tile behind a budget valve, go for the better valve. You feel that decision every single day.
A simple framework to set your priorities
Before you sign any quote, run your plan through a quick priority exercise. It keeps emotions in check when you are tempted by the latest tile or a fancy feature you do not really need.
Use this three step checklist:
- List every major element Layout changes, structural work, plumbing upgrades, electrics, waterproofing, tiling, fixtures, storage, lighting, and accessories.
- Score each element for “lifetime impact” Use a simple [low, medium, high] scale. Focus on how much each item affects daily function and long term reliability.
- Check the spend matches the impact If a “low impact” item is eating a large chunk of the budget, ask yourself why, and whether that money would serve you better bolstering a “high impact” area.
This keeps the project honest. You no longer say “I want that tile” in isolation, you ask “Is that tile more important than better extraction, nicer brassware, or improved storage?”
Beware of “cheap now, expensive later” choices
A low initial price often carries hidden costs, especially in bathrooms. Small rooms are unforgiving, so failures and poor decisions show up quickly.
Common false economies include:
- Reusing a poor layout to avoid moving plumbing, even though the room has always felt awkward. You then invest in finishes around a layout you will still dislike.
- Skipping proper tanking because “it is just a small shower”. When water gets through, the repair bill to floors and ceilings can dwarf the cost of doing it properly on day one.
- Basic, loud extractor fans that nobody uses because they are irritating. The room then stays damp, and you pay again to deal with mould and failing paint.
- Very cheap brassware that pits, leaks, or stiffens after regular exposure to limescale and cleaning. Replacing concealed shower parts inside tiled walls is not a quick job.
- Low quality furniture that swells at the edges or peels in the UK bathroom climate. Once water gets in, there is rarely a neat fix.
When you look at a line item that seems “too good to be true”, ask two questions. How will this behave after [insert time frame] of daily use, and how hard will it be to put right if it fails?
Balancing investment and property value
For homeowners and small property investors, the bathroom is not just about personal comfort, it is part of the asset. You want a level of finish that makes sense for the property, without drifting into overspend that you can never reasonably recoup.
Use these filters to check if your spend is proportionate:
- Property position A compact bathroom in a modest rental might not need premium brand fixtures, but it still benefits from robust, mid range products and a clean, timeless look.
- Hold period If you plan to live in or hold the property for a long time, spending more on durability makes sense. If your horizon is shorter, aim for solid, clean quality without ultra personal touches that buyers or tenants may not value.
- Comparative standard Think about the rest of the property. The bathroom should feel in line with the kitchen and main living areas, not far below or wildly above.
A well designed small bathroom that feels calm, high quality, and reliable often has more impact on perceived value than a larger but cheaply finished space. You want viewers or guests to feel “this has been done properly” as soon as they step in.
How to compare quotes sensibly
If you gather a few quotes for your bathroom, do not just line up the totals and pick the lowest. Look at what is actually included and how clearly it is described.
When reviewing quotes, check for:
- Clear scope Is strip out, waste removal, all first fix and second fix work, tiling, and making good included, or are there vague lines that say “as required”?
- Specified products Are fixtures and finishes described by type and quality level, or just listed as “suite” or “tiles” with no detail?
- Preparation and protection Does the quote mention surface prep, tanking, and subfloor work, or does it jump straight to “fit tiles” and “fit suite”?
- Contingency approach Ask how they handle hidden issues if they are found. You want a clear process, not made up prices on the day.
Often the lowest quote is missing proper preparation, quality materials behind the scenes, or sufficient labour time. A slightly higher but more thorough quote usually works out cheaper than paying twice for failed work.
If you prefer a fixed, design led approach rather than piecing everything together yourself, you can speak to a specialist such as a complete bathroom refurbishment service that handles design, specification, and installation under one roof.
Planning for the “nice to haves” without derailing the basics
There will always be features you would like if the budget stretches, such as underfloor heating, niche lighting, or higher end furniture finishes. The trick is to plan for them without letting them compromise essentials.
Use this two tier approach:
- Tier 1, non negotiables Structural work, waterproofing, plumbing, extraction, main fixtures, and core tiling. These must be funded properly before anything else.
- Tier 2, upgrades Underfloor heating, feature lighting, higher spec brassware finishes, or upgraded furniture. These are added if there is room after Tier 1 is secure.
Discuss this openly with your installer or designer. Ask them to cost Tier 1 and Tier 2 separately, so you can make clear choices rather than shaving a bit off everything and weakening the whole project.
When to bring in a design led bathroom specialist
If you are keen to invest in quality but do not want to get buried in spreadsheets and technical choices, working with a team that handles both design and fitting can save a lot of time and second guessing.
A specialist such as a Cheltenham bathroom design and installation company can:
- Help you set a realistic budget range for your specific room and property.
- Advise where spending more will genuinely improve performance and value.
- Select fixtures and finishes that look good together and cope with UK bathroom conditions.
- Deliver a fixed scope and price, so you are not constantly firefighting extras.
The goal is simple. Treat your small bathroom as a long term investment, not a short term tidy up. When your budget backs that idea, every choice becomes easier, and you end up with a space that looks and feels right for years, not just for the first few months.
Planning the renovation process
A small bathroom renovation looks simple on paper, but once you start stripping tiles and moving pipework, it becomes a tightly timed building project in a very small box. If you want a calm experience and a result that feels solid, you need a clear plan for how the work will run, who will do it, and how you will keep standards high from day one to sign off.
A good bathroom does not happen by accident. It is the result of a controlled process.
Step 1: Decide your scope before you speak to trades
Before you start asking for quotes, get clear on what you actually want to change. This saves you from vague, messy pricing and constant “while we are here” add ons.
Use this quick scope checklist:
- Are you keeping the layout the same, or are you open to moving fixtures if it improves the room?
- Do you want everything stripped back to bare walls and rebuilt, or just selective updates?
- Are you replacing all tiles and flooring, or only certain areas?
- Do you need lighting and extraction upgraded, not just swapped like for like?
- Are you aiming for a full, long term renovation, or a shorter [insert time frame] solution for a rental?
Write this down. When you brief a bathroom specialist, you are then talking about the same job, not your idea of a “full renovation” and their idea of a “small refresh”.
Step 2: Choose trustworthy tradespeople or a bathroom specialist
In a small bathroom, there is nowhere to hide poor workmanship. You need people who work cleanly, think ahead, and respect both your property and your time.
Decide your route first:
- One specialist bathroom company who handles design, supply, and installation as a single project.
- Separate trades such as a plumber, tiler, electrician, and decorator that you coordinate yourself.
If you want a single point of contact and less project management on your side, a design led bathroom company that works regularly in Cheltenham and Gloucester, such as NML Bathroom Renovations, can be a better fit. If you prefer to control each trade directly, expect to spend more time planning and sequencing the work.
What to look for in any bathroom fitter or specialist:
- Clear, detailed quotes that list what is included, not just one line that says “fit bathroom”.
- Regular bathroom work, not someone who mostly does general building and “can do a bathroom if needed”. Bathrooms have their own quirks.
- Evidence of quality such as a portfolio or gallery, and independent feedback. You can also check customer reviews for a feel of how a company actually works on site.
- Insurance and qualifications especially for electrics, gas (if relevant), and any structural changes.
- Comfortable communication This is the person or team in your house. You want someone who answers questions directly and does not dodge detail.
You are trusting them with a room that is used every day. If anything feels off in the way they quote or talk about the work, pay attention to that before you sign.
Step 3: Get a proper site survey and written proposal
A small bathroom needs accurate measurements and a clear plan. Guesswork at this stage usually turns into problems on site.
A thorough site survey should cover:
- Accurate room dimensions, including ceiling height and awkward areas.
- The state of existing walls, floors, and pipework.
- Access routes for getting old items out and new items in.
- Ventilation and existing electrics, including where upgrades are needed.
- Any signs of current leaks, movement, or damp that need fixing before you start making things pretty.
On the back of that, you should receive a written proposal that explains:
- The sequence of works, from strip out to finishing touches.
- What is included in the price and what is clearly excluded.
- How long the project is expected to take, in working days.
- Payment stages linked to clear milestones, not vague dates.
If a contractor is unwilling to put detail in writing, they are not protecting you or themselves. That usually shows later, when memories differ over what was agreed.
Step 4: Build a realistic timeline that fits your life
Even a small bathroom renovation creates disruption. You lose access to the room, you have people in your home, and there is dust and noise. Planning the schedule well makes a big difference to how stressful that feels.
Think about these timing points:
- Lead times for fixtures and tiles Some products need ordering in advance. Starting work before everything is on site is how you end up with gaps and delays.
- Alternative bathroom access If the room is the only bathroom in the property, you must agree a plan, perhaps a temporary toilet or phased work, before anyone starts.
- Workday expectations Clarify normal start and finish times, and which days the team will be on site.
- Key decision points Identify when you must finalise things like exact tile layout, grout colour, or mirror position, so you are not forced into rushed choices on the day.
A typical sequence for a full small bathroom renovation looks something like this.
Standard project order of works:
- Protection of access routes and adjacent rooms.
- Strip out of existing fixtures, tiles, and finishes.
- Inspection and any repairs to structure, subfloor, and walls.
- First fix plumbing and electrics, including any new positions.
- Boarding, plastering, and waterproofing in wet areas.
- Tiling of floors and walls, including trims and niches.
- Second fix fitting of sanitaryware, furniture, and brassware.
- Installation of lighting, extractor, and accessories.
- Silicone, final adjustments, and thorough clean down.
- Final walkthrough and snagging list, then completion.
Ask your installer to walk you through how their schedule lines up with this. You do not need exact hour by hour detail, just a clear sense of what happens each week and when you will get the room back.
Step 5: Minimise disruption at home
You cannot avoid disruption completely, but you can manage it. A lot of the stress disappears when everyone knows the plan.
Before work starts, agree on:
- Which entrance the team will use and where they can park.
- Which areas they can access, and which are private.
- Where tools and materials will be stored during the project.
- How dust and noise will be managed, including floor protection and door coverings.
- How often you will get updates, for example a quick check in each day or a summary at the end of the week.
Move personal items, towels, and anything fragile or valuable out of the way before day one. In a small house, even a few unused boxes make circulation harder for everyone.
Simple ways to make the project easier to live with:
- Plan any heavy water use, such as washing machines, around key plumbing days.
- Warn neighbours about noisy phases such as drilling tiles or breaking out old fittings.
- Keep pets and children away from the work area, especially during strip out and tiling.
The more you treat this like a focused short term project and less like “a bit of work happening in the background”, the smoother it runs.
Step 6: Keep control of quality during the build
Quality control does not start at the end, it runs through the whole project. In a small bathroom, small errors in straightness, levels, and details are very obvious, so it pays to stay engaged.
Key checkpoints you should expect:
- After strip out Confirmation of any hidden issues, such as damaged joists or rotten boards, and agreement on how they will be fixed and what it means for budget and time.
- After first fix A quick review of pipe and cable positions, so you know where services run and can confirm fixture locations.
- Before tiling starts Agreement on tile orientation, starting points, and where any cuts will fall. In a small room this is critical for a balanced look.
- Before second fix Check that wall surfaces are flat, waterproofing is in place in wet zones, and floors feel solid underfoot.
You do not need to stand over tradespeople, but you should feel able to ask clear questions such as:
- “Where will the full tiles land on this wall?”
- “How are you tanking the shower area?”
- “Can you show me the fall to the shower drain?”
A good installer answers calmly and can show you what they have done. If anyone becomes defensive about reasonable questions, that is a warning sign.
Step 7: Manage changes and extras properly
Even with good planning, small changes sometimes crop up. The key is to control them so they do not spiral.
Set a simple rule for variations:
- No change happens without a clear explanation of impact on cost and timescale.
- Every variation is confirmed in writing, even if it is a short email or message recap.
- Nice to have changes, such as a different tile pattern or upgraded fitting, are weighed against the contingency you set aside, not bolted on blindly.
Examples of variations include moving a light after first fix, discovering more damaged flooring than expected, or deciding to tile an extra wall. None of these are disasters, but unmanaged they can cause friction and budget creep.
Step 8: Snagging and handover
At the end of the project, you should not feel rushed to sign off. Take time to walk the room carefully with your installer and note anything that needs attention.
Use a simple snagging checklist:
- Check tiles for chips, consistent grout lines, and clean silicone joints.
- Run taps, shower, and flush the toilet, watching for drips, slow drainage, or inconsistent water temperature.
- Turn lights and the extractor on and off, including any separate circuits or mirror lights.
- Open and close all doors, drawers, and shower screens to check clearances and smooth movement.
- Look at finishes in both daylight and artificial light, so you spot any missed sealant or marks.
Agree a list with your installer and a timeframe to complete any snags. A professional team will expect this and plan a return visit if needed.
You should also receive:
- Instructions for any specialist fittings, such as shower valves, underfloor heating, or extractor fans.
- Details of any warranties on fixtures and on the installation itself.
- Advice on cleaning and maintenance, especially for grout, silicone, and specialist finishes.
Step 9: Think beyond day one
Planning the renovation process well is not just about getting to that first “wow” moment. It is about how the bathroom behaves in real life for [insert time frame] after you cut the ribbon.
A well managed project gives you:
- Confidence that what is behind the tiles is as solid as what you can see.
- A layout and fixture setup that matches how you actually live, not just what looked good on a brochure.
- A clear record of what was installed and by whom, so any future tweaks or upgrades are straightforward.
- A space that feels calm to use every day, because it was built in a calm, controlled way.
If you would rather hand the planning, scheduling, and quality control over to a team who deal with this every day, a design led bathroom specialist such as NML Bathroom Renovations in Cheltenham can take the whole process off your plate. You focus on how you want the room to look and feel, they focus on the practical steps that get it built properly.
Maintaining your small design bathroom for longevity
A well designed small bathroom in your Cheltenham or Gloucester property should look and feel solid for a long time, not just for the first few months. The good news is, if the renovation has been done properly, day to day care is straightforward. You just need the right routines, the right products, and a bit of awareness of how different materials behave in a UK bathroom.
Think of maintenance as protecting an investment, not constant “cleaning duty”.
Set up a simple maintenance routine
You do not need a complicated schedule. What works best is a mix of quick, regular habits and less frequent deeper checks.
Use this basic rhythm:
- Daily or every couple of days quick wipe downs, ventilation, and tidying.
- Weekly a more thorough clean of fixtures, glass, and floors.
- Monthly or quarterly checks on grout, silicone, and ventilation performance.
In a small bathroom, small issues show up quickly. Spotting and dealing with them early is what keeps the room looking “new” for much longer.
Daily habits that protect finishes
Two or three minutes of attention after showers or baths can save you a lot of work and money later.
Build these into your normal routine:
- Run the extractor every time you shower or bathe, and let it overrun fully. If you have a window, crack it open for a short time once you are out.
- Squeegee glass and tiles in the shower area. A quick pass over screens and nearby tiles removes most water before it dries into limescale and marks.
- Wipe wet ledges such as around the basin, on top of vanity units, and along bath edges, so water does not sit against silicone or furniture edges.
- Put items away into planned storage. Clear worktops and window sills make cleaning faster and stop products leaving marks on surfaces.
These routines might feel minor, but combined with good ventilation they dramatically reduce mould, foggy glass, and stained silicone.
Choosing cleaning products that will not wreck your bathroom
Many “heavy duty” bathroom cleaners are too harsh for modern high quality finishes, especially on brassware, furniture, and some tiles. The wrong product can strip coatings, pit metal, or damage sealants.
General rules for cleaning products:
- Go mild first Start with warm water, a soft cloth, and a gentle, non abrasive cleaner that is clearly labelled suitable for bathrooms.
- Avoid scourers and harsh pads on any polished, matt, or coated surfaces. They leave fine scratches that collect dirt and dull the finish.
- Limit bleach and strong acids near silicone, grout, and metal. Occasional targeted use on stubborn areas is one thing, regular soaking is another.
- Always rinse residues off tiles, glass, and metal, then dry with a soft cloth where possible to avoid streaks and water spots.
If your bathroom fitter or supplier has left care guides for specific products, keep them. Use those as the default before you reach for anything stronger.
Looking after taps, showers, and brassware
Good brassware is built to handle UK water and regular use, but it still needs sensible care, especially in harder water areas.
Weekly or fortnightly care:
- Wipe taps and shower controls with a soft cloth and mild cleaner, then dry. This removes soap and light limescale before it builds.
- Clean around the bases of taps and fittings, where water and soap often sit.
- Check flexible hoses for kinks and make sure there are no splits or bulges.
Dealing with limescale without damaging finishes:
- If you use a limescale remover, apply it to a cloth or sponge, not directly onto the fitting, and keep contact time short.
- Rinse thoroughly and dry straight away.
- For shower heads, follow the manufacturer’s instructions for descaling. Often soaking the head or unscrewing and soaking the rose works best.
Many tap and shower finishes have protective coatings. Strong chemicals break that coating down and shorten the life of the fitting, so keep things gentle and regular instead of aggressive and infrequent.
Keeping glass and mirrors clear
In a compact bathroom, shower screens and mirrors dominate the visual field. If they are streaked or spotted, the whole room feels tired.
For shower screens:
- Use a squeegee after showers to strip water off the glass while it is still wet.
- Clean weekly with a non abrasive bathroom glass cleaner or a mild diluted solution recommended for glass.
- Pay attention to the bottom edges, hinges, and seals. Wipe these by hand to stop soap scum building.
For mirrors and mirrored cabinets:
- Use a soft, lint free cloth and a glass safe cleaner or a mild diluted solution.
- Avoid spraying cleaner directly at the edges of the mirror, especially near the backing, to reduce the risk of de-silvering over time.
- Do not use abrasive pads. Even fine scratches will catch the light and make the mirror look hazy.
If you have a backlit mirror, occasionally wipe around the edges and behind it where you can reach, as these areas can collect dust and condensation.
Caring for tiles, grout, and silicone
Tiles are tough, but grout and silicone are where most bathrooms start to look tired. Keeping these clean and intact is one of the biggest wins for long term appearance.
Routine cleaning for tiles and grout:
- Use a soft brush or cloth with a mild bathroom cleaner, working from top to bottom.
- Rinse walls and floors well to remove any residue that could leave streaks or attract dirt.
- Dry or squeegee wet areas, especially in showers, to reduce standing water on grout lines.
Watching for early warning signs:
- Discolouration in grout that does not lift with normal cleaning.
- Cracks or small gaps in grout, especially in corners or on floors.
- Silicone that lifts at edges, darkens internally, or feels loose when lightly pressed.
If you catch these issues early, repairs are usually simple. A small section of failed silicone can be cut out and replaced neatly. A cracked grout line can be raked out and regrouted before water gets through to the substrate.
Looking after vanity units and fitted furniture
Quality bathroom furniture is designed to handle humidity, but it is still vulnerable at edges and around cut outs where water can creep in if it sits for long periods.
Good habits around furniture:
- Wipe up splashes on worktops and drawers, especially near joints and around the basin.
- Do not leave very wet cloths or bottles with drips sitting on top of units.
- Use gentle cleaners on doors and fronts. Many recommend a damp cloth and a mild detergent, followed by drying.
Check these areas occasionally:
- Sealant lines where the basin meets the worktop or unit.
- Internal shelves under basins, to make sure small leaks have not gone unnoticed.
- Bottom edges of tall units, especially if they sit near a bath or shower where splashes can hit regularly.
If you ever see swelling, soft spots, or peeling, take it seriously. Identify and fix the water source first, then deal with the damaged panel. Leaving it always makes replacement more involved.
Managing moisture to prevent damp and mould
Even with good extraction, a small bathroom can accumulate moisture faster than larger rooms. Managing that moisture is as important as cleaning.
Ventilation checks:
- Check that the extractor fan comes on reliably and runs for its set overrun time.
- Hold a thin piece of tissue near the fan grille when it is running to feel whether air is being drawn in.
- Look for condensation patterns. Persistent misting on windows or ceilings can signal that ventilation is not quite doing its job.
Behaviour tweaks that help:
- Keep shower doors or curtains partly open after use, so air can circulate and the enclosure dries faster.
- Avoid drying large amounts of washing in the bathroom unless you have particularly strong extraction.
- Keep storage slightly away from external walls where possible, to avoid creating cold, stagnant air pockets.
If you suspect your fan is underperforming or badly placed, speak to your original installer or a bathroom specialist who understands UK regulations. Upgrading the fan or improving ducting is usually far cheaper than dealing with long term damp damage.
Protecting flooring in a small bathroom
Floors in compact bathrooms work hard. Water, hair products, dropped items, and daily foot traffic all add up.
Simple ways to keep the floor in good condition:
- Use a properly backed bath mat near the bath or shower, and hang it up after use so it can dry.
- Wipe up spills quickly, especially products like hair dye or strong cleaners that can stain grout or some surfaces.
- Clean with a product suitable for your specific floor type, whether that is tile, vinyl, or something else approved for bathrooms.
- Avoid dragging heavy items across the floor. Lift laundry baskets or stools rather than sliding them.
Check along the junctions where floor meets skirting, shower trays, or baths for any cracking or gaps in grout or silicone. In a small room, these edges are short, so it is easy to scan them in one go.
Spot checks that prevent bigger problems
Every few months, take ten minutes to look at the room as if you were inspecting someone else’s work. You are not cleaning, you are checking.
Use this quick inspection checklist:
- Look at ceilings and high corners for any signs of mould or staining.
- Check grout lines in showers and around baths for movement, cracks, or missing sections.
- Press lightly along silicone joints to see if any parts have detached from the surface.
- Open vanity units and check under basins and around traps for damp patches or drips.
- Run your hand along accessible pipework to feel for any moisture.
- Test all taps, flush, and shower controls, checking that flows and temperatures feel as expected.
If you find small issues, you can decide whether they are within your skills to fix or better handled by a professional. The important part is catching them before they become leaks into the floor below or widespread staining.
When to bring in a professional rather than DIY
Surface cleaning and very minor touch ups are fine to handle yourself. Certain issues are better dealt with by someone who understands bathrooms and UK plumbing.
Call in a professional if you notice:
- Persistent damp patches, especially on ceilings or walls outside the bathroom.
- Movement in the floor near the shower or bath, such as a “spongy” feel under tiles.
- Water escaping from under shower trays or at the base of screens.
- Significant mould that keeps returning despite good ventilation and cleaning.
- Loss of water pressure or temperature control that suggests valve or pipe issues.
A bathroom specialist, such as a company experienced in bath to shower conversions and full renovations, can often diagnose the cause quickly and suggest a fix that does not undo all the good work in the rest of the room.
Keeping your bathroom feeling “new” for longer
Longevity is not about babying the room. It is about matching realistic use with sensible care.
In practice, that means:
- Ventilating properly every time you create steam.
- Cleaning little and often with products that respect your finishes.
- Staying on top of grout, silicone, and small seal failures before they spread.
- Checking hidden areas now and again so leaks do not surprise you.
When you treat your small bathroom as a long term part of the property, not a temporary refresh, it repays you with fewer repairs, less hassle, and a room that still feels considered years down the line. If you ever decide the space needs a refresh or an upgrade in function, a design focused installer such as a local bathroom renovation specialist serving Cheltenham and surrounding areas can build on that solid base rather than starting again from damage control.

